Last update at :2024-02-02,Edit by888u
Today I will introduce you to a VPS.
Bandwagonhost (Chinese people call them bricklayers), reasons for choosing Bandwagonhost:
1. For businesses under IT7, the probability of running away is basically 0
2. All plans have 1Gbps ports and good speed
3.4 data centers can be switched freely (the Los Angeles computer room is very fast)
4. The price is cheap and everyone can afford it
5. Suitable for novices to learn and reinstall the system without restrictions
Generally, the commonly used Bandwagonhost VPS (Banwagonhost) has 6 cheap annual payment plans. Please enter the purchase directly through the link below. You cannot see these plans by going directly to the homepage of Bandwagonhost to purchase. You can also register an account directly to purchase. If it doesn’t work, there will be problems such as not being able to see the verification code. Please be sure to register an account while purchasing through the link below.
| Package | Memory | Number of CPU cores | Hard disk | Monthly traffic | Price | Purchase address |
| 10G KVM PROMO | 512M | 1x Intel Xeon | 10G | 500GB | $2.99/month $19.99/year | Click to buy< /td> |
| 20G KVM PROMO | 1G | 2x Intel Xeon | 20G | 1 TB | $4.99/month $49.99/year | Click to buy< /td> |
| 40G KVM PROMO | 2G | 3x Intel Xeon | 40G | 3TB | $9.99/month $99.99/year | Click to buy< /td> |
| 80G KVM PROMO | 4G | 4x Intel Xeon | 80G | 3 TB | $19.99/month $199.99/year | Click to buy< /td> |
| 160G KVM PROMO | 8G | 5x Intel Xeon | 160G | 4 TB | $39.99/month $399.99/year | Click to buy< /td> |
| 320G KVM PROMO | 16G | 6x Intel Xeon | 320G | 5 TB | $79.99/month $799.99/year | Click to buy< /td> |
PS: Use the discount code BWH1ZBPVK to get a 6% discount
The main differences between each plan are hard disk, memory and traffic, but other aspects are the same. Here I will take the cheapest Micro-64 solution as an example to introduce the purchase tutorial. Because this plan has the largest number of buyers, it is just for - you know.
Bandwagonhost VPS purchase tutorial
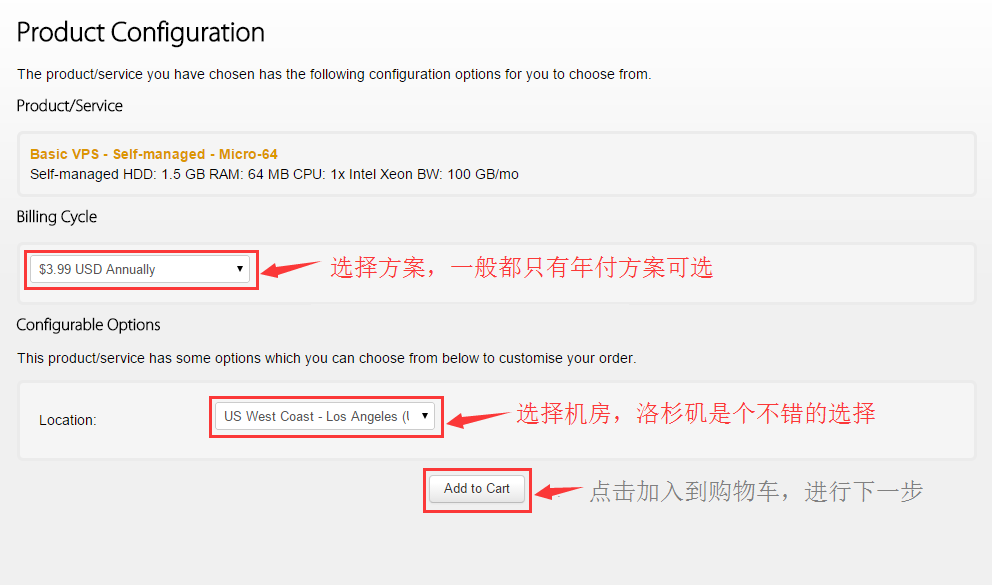
Please first enter the corresponding purchase page through the corresponding link above. For example, if I purchase the Micro-64 solution, click the direct link to the Micro-64 solution. Go to the purchase page. As shown below:
After selecting the plan, click "Add to Cart" to add to the shopping cart, then enter the next page and confirm the selected plan, as shown in the figure:
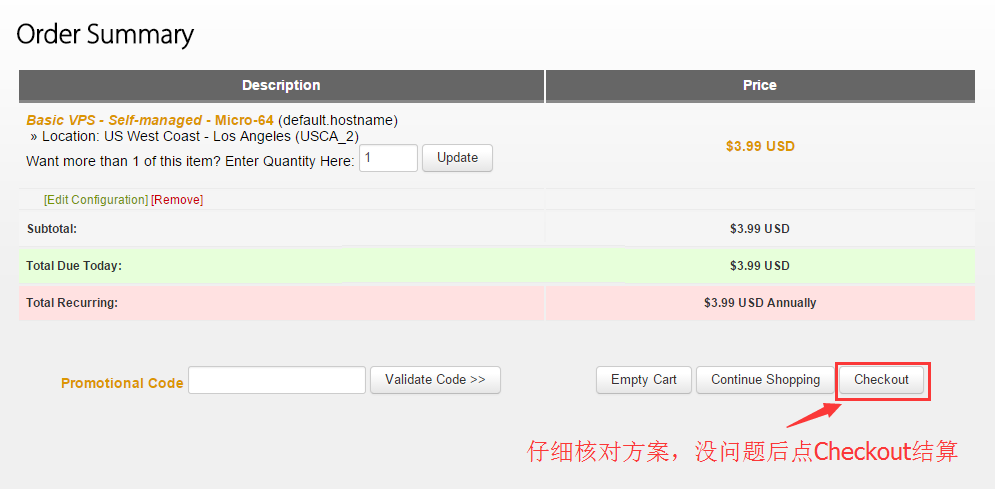
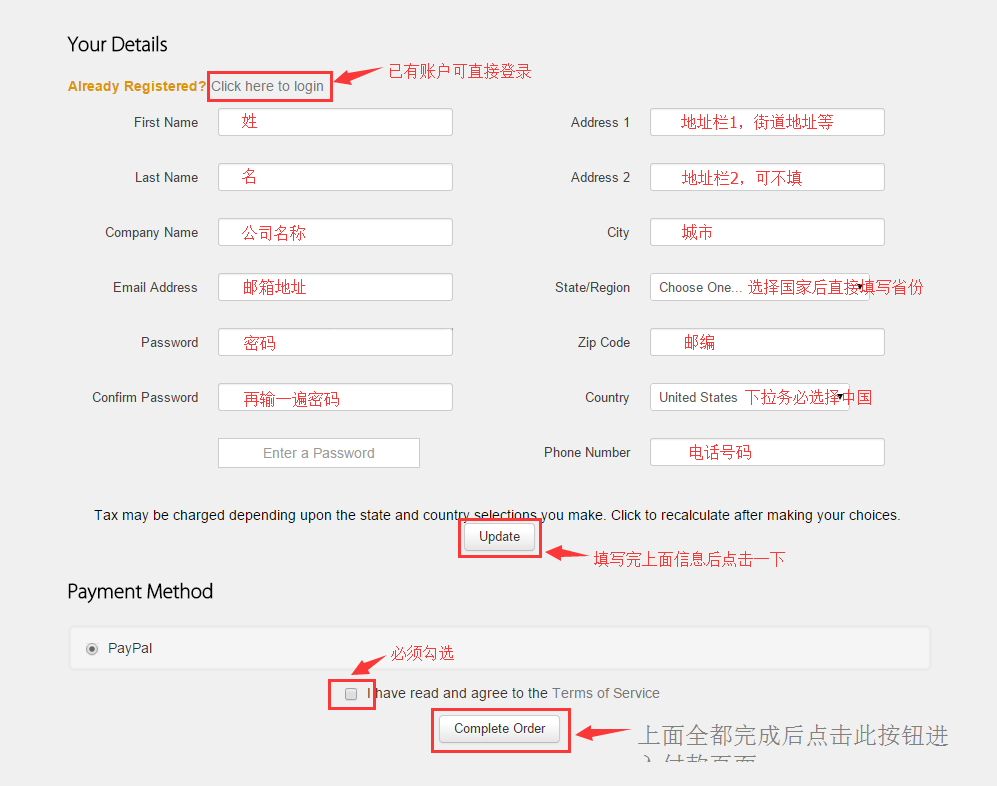
After carefully checking that there is no problem with the selected plan, click "Checkout" to enter the settlement page. Then the user information will automatically pop up below, as shown in the figure. There are several points to note when filling in the form below:
- The country must be selected as China, otherwise it will be deemed as a fraudulent order and the purchase will fail;
- The province and city must be the same as your IP address, otherwise it will also be considered a fraudulent order;
- You can fill in the specific address as you like;
- It is recommended to fill in a real phone number, but it doesn’t matter if you fill it in casually. Generally, it is not checked.
After all the above work is completed, click "Complete Order" to enter the payment page. Currently, Bandwagonhost only supports PayPal payment, and you can bind UnionPay card payment through PayPal.
Bandwagonhost VPS simple use tutorial
After the purchase is completed, we should use our VPS. How to use it? Here I will give you a simple version of the practical tutorial so that you can use it first. For specific and more detailed tutorials, you can refer to the tutorial page of this site.
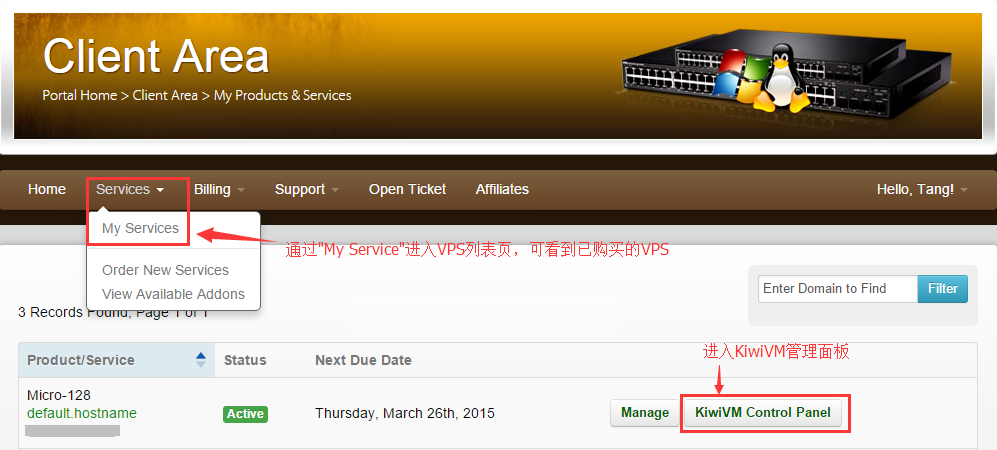
First we need to see the VPS we just purchased. How can we see it? Click "Services" on the user homepage and select "My Services" from the drop-down menu to enter the VPS list page, as shown in the figure:
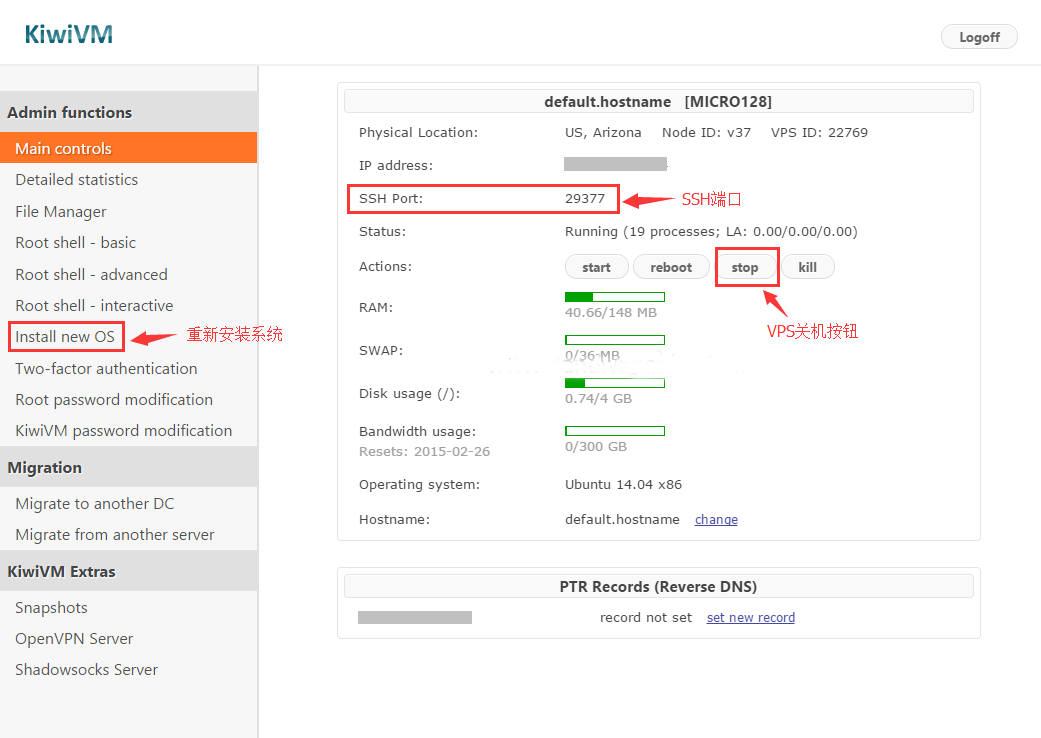
After entering the KiwiVM panel, we can see the SSH port of the VPS. Note that the SSH port of Bandwagonhost is not the default port, but a random port, so it must be viewed in the KiwiVM panel. .
We click "Stop" to temporarily shut down the VPS, then click "Install new OS" to reinstall the system and select the system we need.
Note: The VPS I use for demonstration here is a VPS I have purchased before, not the Micro-64 solution I just purchased, so the memory and hard disk information seen here are different from the Micro-64 solution. Don't be surprised.
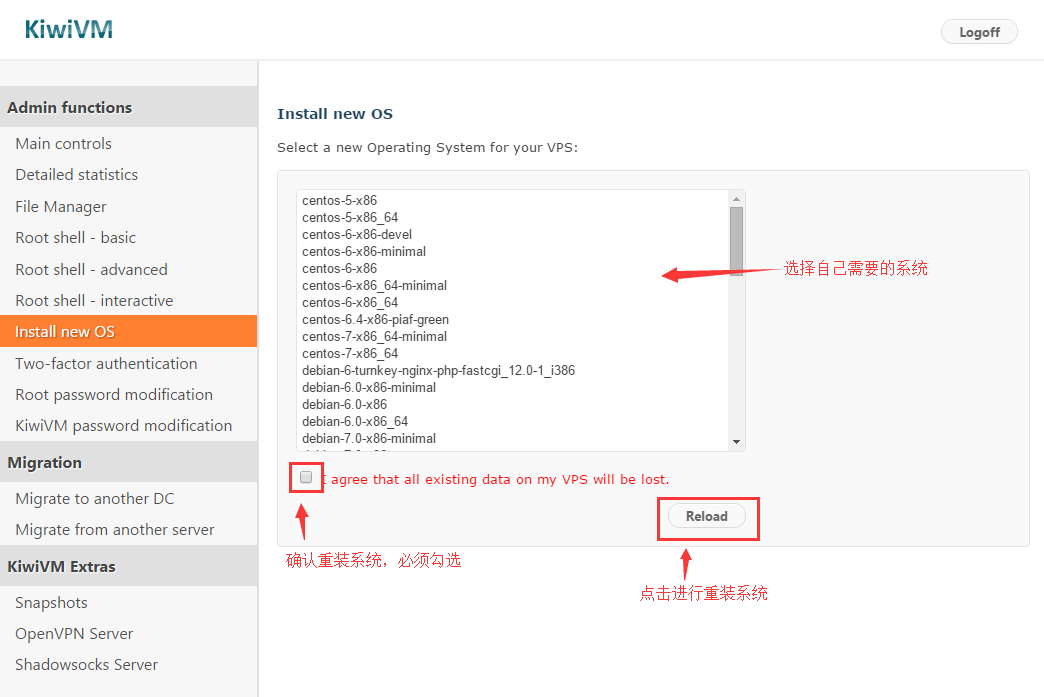
After coming to the system reinstallation interface, we can select the system we need and reinstall it, as shown in the figure:
Recommended site searches: domain name registration service website instant solution server, php hosting space, US host purchase, foreign server, Internet cafe IP address query mainland China domain name registration, US host purchase, expired registered domain name query, agency IP purchase website, < /p>


发表评论